Sunday, April 17, 2011

My Weekend Accomplishment...

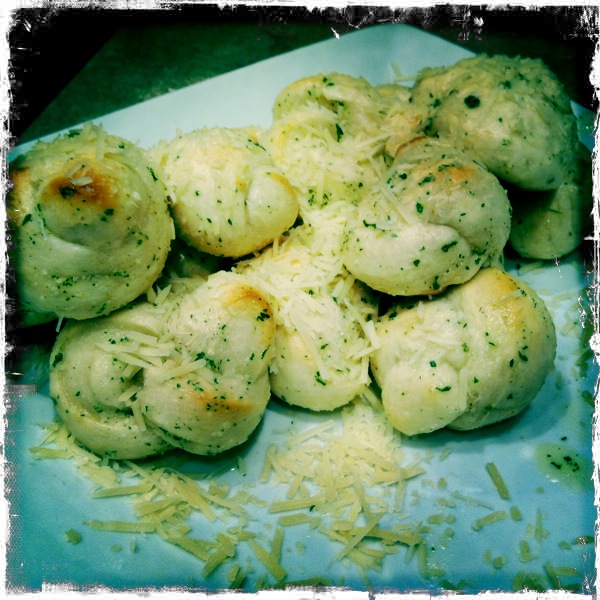
Amid a {fabulous} trip to Vegas, I made bagels. For the first (with an encore second and third) time this weekend.
This one is a beauty, but the best one's were the Asiago Cheese.

Recipe to come... I just had to share {aka brag} about my accomplishment.

Thursday, April 14, 2011

Spicy Ginger Pasta

I LOVE this meal! It is definitely in the running to be my favorite - it's a current 3 way tie between this, taco's, and this yummy BBQ Sandwich. Not surprisingly - I got 2 of these 3 recipes from Jamie. Maybe she should be the one running a food blog.

This recipe is super easy and takes about 25 min start to finish (which are my favorite kind of recipes). The flavors of this dish are just the best - a bit of spice, peanuts, and veggies that actually taste good.
Try it. You'll like it.

Spicy Ginger Pasta

8 – 10 oz Angel hair spaghetti
1-2 chicken breasts cubed (if desired)
1 cup Broccoli florets
½ red pepper
½ green pepper
½ zucchini
½ cup chopped (or not) peanuts
Sauce:
1 cup Kraft Toasted Sesame dressing
3 Tb Soy Sauce
½ tsp Garlic powder
¼ - ½ tsp Red pepper flakes
½ tsp freshly grated ginger. (I add a lot more ginger than this - I love the taste of it so just add it to your liking)

Directions:
Cook pasta according to package. When there is 3 minutes left, add the broccoli. 
Meanwhile, in a fry pan add a bit of olive oil (or plain Veg oil). Brown chicken until you can't see any more pink (chicken is about 80% cooked at this point and it will finish cooking when you return it to the pan). Remove from pan and cover.
Fry peppers and zucchini . Add chicken to finish cooking (about 2 minutes). 
Turn down the head and add the sauce to the pan. Sauté until pasta is ready.

Put pasta in bowl. Pour sauce on top. Gently mix. Sprinkle peanuts on top. Enjoy!

Tips:
  • You can adjust the heat/spiciness of this by using less (or no) red pepper flakes as well as limiting the ginger you use
  • You can really use any veggies you might like in this. We have refined this to how we like it (the broccoli is my favorite since it soaks up the sauce, but then I love the zucchini for it's different texture, but then I love the peppers for their crunch... see what I mean? I love it!)
  • You can also use any noodle you want - but long work's best for my taste
  • I also use the Light version of the dressing - no difference in taste and saves some calories.
  • These are hands down my favorite left-overs, I love to eat them cold right out of the fridge.
I hope I didn't talk this up too much - but it is honestly so good!
Enjoy!

Sunday, April 10, 2011

Perfect Day for Grillin'

After 4 days of storming it was time for a change of pace so we decided to break out the BBQ and make a meal of it.

Usually for marinades I just through whatever I think in and it usually turns out ok, but a while ago kabob's were a bit of a mystery to me so I decided to find an actual recipe to try. I hit the jackpot on the first try. We LOVE the flavor of this and it is still subtle enough that you get the flavor of the veggies.

Summer Time Kabobs

Ingredients:
4 chicken breasts (we use tenderloins and it is about 8-10 depending on size)
1/2 C soy sauce
4 Tbs lemon juice
1 C cooking oil
1 tsp parsley flakes
1 tsp basil
1/4 tsp onion powder
1/4 tsp pepper
Dash of garlic powder
Veggies of choice (we use cherry tomatoes, red and green peppers, and zucchini. If you are an onion fan I think those would add good flavor)

Directions:
You can do this one of two ways-
I marinate just the chicken while it thaws and up until about and hour or two before I start cooking and then cube and skewer (alternating with veggies) and then marinade for the remaining time
or
Cube the meat and skewer (alternating with veggies) and marinate them all together.
Either way you do it, just mix all ingredients above and pour over chicken/skewers.
Cover and chill for at least 3 hours (if not more for more flavor) - rotating occasionally.
Grill for about 8 - 10 min turning once - or as needed.

Tips/Ideas:
  • These go great with almost anything - we have made them with twice baked potatoes, salad, and rolls, but they would also be good with rice and crunchy crusted bread.
  • These cook fast and are best when the meat stays moist - so don't overcook.
  • I have yet to try this on any other meat - but think we might try steak in it - I'll let you know how it goes.
I hope you all like this as much as we do. Just mixing the marinade it starts to smell good and makes my mouth water. It's also an easy way for us to get veggies into our diet - we struggle with that sometimes...


Wednesday, April 6, 2011

Prize Winner

Finally documented: My Garlic Knots (here)
Seriously, you've got to try these things.

Tuesday, April 5, 2011

Chicken Ranch Taco's

We are huge fans of Taco’s in our house – a post to come I’m sure – we usually just do the Plain Jane ground beef but we spiced it up a bit last night. I would say it was a success.

Chicken Ranch Taco’s
Ingredients:
1 box hard taco shells (the Stand N Stuff one’s work perfect for this)
3 C cut up deli rotisserie chicken
1 pkg taco seasoning (due to the fact that we hate this – we substituted 1 tbs  Montreal steak seasoning – our favorite)
3/4 C ranch (I made homemade Café Rio-esque dressing – divine! Find here)
 Any desired toppings: cheddar cheese, lettuce, salsa, extra ranch, tomatoes, jalapenos, etc.

Directions:
Heat oven to 325 and heat shells as directed on the box.
Coat chicken with seasoning and microwave until hot – stir in dressing (you can do this before you head it up as well if you want it all warm)
Spoon chicken mix into taco shells and top as desired (I topped with cheese and put back in the oven to melt it before adding the other toppings)
Enjoy!

These are super easy – even with making the dressing and cutting up the chicken it took maybe 35 min start to finish.

Not Quite but Close

This isn't an exact duplicate of the Cafe Rio dressing - but it is close enough for me and we love it (thanks to Amy for perfecting this for us).

Sometimes I think I could just drink this – it makes everything taste better and is actually a danger to have in the fridge. But man do I love it.

Café Rio-esque Dressing
Ingredients:
3 tomatillos
1 jalapeno
1 packet Ranch dressing mix
1-2 cloves garlic
1/2 cup mayo
1/2 cup sour cream
1/4 tsp paprika
Cilantro to taste

Directions:
In a blender, blend the tomatillas and then strain the juices out.
Add everything else and blend until smooth.

Due to the produce in this – you may have to adjust the amounts according to taste.

Sunday, April 3, 2011

Yumminess

I'm at a loss of what to call this - other than divine, delicious, scrumptious, and any other yummy word you can think of. 

Brad, my brother in law, always called mint chocolate chip ice cream "Starlight Mint" and I had never heard of that - but kind of like that for this, because that is what it tastes like.

Starlight Mint Delight

Ingredients:
4 eggs
3/4 C Sour Cream
1/2 C Oil
1 tsp Peppermint Extract

1 Chocolate Cake Mix
1 small pkg Chocolate Pudding
1 Tbs Flour
1 C Chocolate Chips
1 Pkg Andes Mints (chopped up)
I tub of chocolate frosting

Directions:
Preheat oven to 350
Mix the first 4 ingredients until smooth.
Add the cake mix and pudding mix.
In a baggie coat chocolate chips and 1/2 the Andes Mints with flour and add to the mix.
Grease and flour bundt pan and pour mix in
Cook for 45-55
Melt tub of chocolate frosting and spoon over warm cake and sprinkle the rest of the Andes mints on top.

Tips/Ideas:
  • With the melted frosting and warm cake it does get a bit messy - so you can wait a bit for the cake to cool and it stays on the cake a bit better.
  • Wait for the cake to cool before adding the Andes, they melt really fast when the cake is warm.
  • Slide strips of parchment paper under the edges of the cake when you frost it - then you can just remove them and it looks clean and perfect
  • Top with vanilla ice cream and thoroughly enjoy!
  • Also - feel free to invite me over anytime you make this.

Wednesday, March 30, 2011

Heart Stopping Goodness

This is a dish I've been wanting to try for a while. I had it years ago while visiting an old boyfriends grandma - random I know. But it was just so good and I have never forgotten the amazingness of the ritz topping on this: TO. DIE. FOR.

Poppy Seed Chicken
2 roasted chickens, meat removed and diced into small cubes (or about 2 lbs chicken - boiled and cubed for convenience - but the roasted chicken probably has a better taste)1 8 oz. pkg. cream cheese, softened
1 can cream of chicken soup
1 16 oz. carton of sour cream
1-2 Tbs. poppy seeds
1 sleeve Ritz crackers, crushed
1/2 stick of butter, melted

In a bowl, mix the cream cheese, cream of chicken soup and the sour cream. Blend until creamy and smooth. Add the poppy seeds and the chicken. Stir until combined.

Pour the mixture into a 9x13 baking dish. Bake at 350 degrees F. for 30-40 minutes or until bubbly.

Combine the cracker crumbs and the butter, tossing to coat. Spread the crumbs evenly on top of the chicken. Bake an additional 10
minutes, or until the top is golden brown.

Tips/Ideas
  • I remember this being a bit different than what this recipe made - so next time I am going to leave out the cream cheese. I thought that would for sure make this dish - but it really just over complicated the taste and actually made it a little too thick for my liking
  • We served over rice - which is where a more "sauce-y" dish would be preferable - but can be just the main dish with any variety of sides
  • We thought of serving it on a baked potato - to be tested with our left overs
  • I think we might try full chicken breasts next time as more of a "main dish"
  • Overall this dish was good - although not healthy in the least bit and just a few tweaks to make it perfect!

Monday, March 28, 2011

Windy City Style

A few years ago while visiting Chicago I tasted the famed Chicago Style Deep Dish Pizza. Let me tell you, it has its reputation for a reason.

I haven't had it since and don't think I even know of somewhere around here that serves Chicago Style Pizza. So naturally I decided to tackle it myself.

I've never been a fan of homemade pizza so I wanted to make sure I did it right - I did a lot of research! I read tons of dough recipes, tips, tricks, and musts. After my thorough reading, I dove right in! So here you have it:

Chicago Style Pizza

Dough

Ingredients:
3 1/2 C Flour
1 1/2 C Water
1/2 C Yellow Cornmeal
1/2 C Canola Oil (I just used vegetable oil)
1 tsp Sugar
1 tsp Salt
2 1/4 tsp  Active Dry Yeast

Directions:
24 hours prior to baking:
Mix water, sugar, yeast, flour, cornmeal,  and salt.
Mix at a low speed until  the dough comes together and then slowly add oil. Mix for 7 more minutes (in my reading I read that the less you knead the dough the more biscuit like your crust will be - which is more authentic to Chicago, but you may want it more "bread" like - I only mixed for 2 minutes).
Form the dough into a ball and place in a bowl - loosely cover with plastic wrap and then a dish towel and refrigerate over night.

One hour prior to baking:
Get the dough out of the fridge about an hour before baking.
Preheat the oven at least 30 min if not more at 450 (also in my research, everyone raved about a pizza stone - so we splurged for $13 (at target) and got one - I'M A BELIEVER! If you use one, make sure it is in the over for about an hour to preheat)
Once the dough has "rested" for and hour coat the bottom of a 15 X 2 deep dish pan (I bought a 12 x 2 cake pan from Michael's for $6.50 w/coupon - but this left dough over for garlic knots- Yum!) with regular olive oil (the recipe says specifically not extra virgin and I also added some cornmeal for the crust)
Place the ball of dough in the middle and spread out to the edge and then use your fingers to pinch it up on the edge (should be about 1/8" thick)

Now comes the toppings!
This is the trademark of Chicago pizza - you top it backwards!

Cover the bottom of the dough with sliced mozzarella (I just bought the ball of mozzarella and sliced it to my liking - which was a bit thicker)
Next add whatever toppings you might like (we did pepperoni and sausage)

Now comes the sauce (I was nervous about this, but it turned out AWESOME!)
One large can of crushed tomatoes (I think about 26 or 28 oz)
Spoon over the top of your pizza
Season with Italian seasoning, oregano, basil leaves, garlic salt (all to your taste - but since they are plain tomatoes I would suggest more than you think)
Sprinkle some Parmesan cheese.
Cook for 20 to 25 minutes (turning half way through) or until golden brown (this is where the pizza stone is genius - since it has been heating for an hour it distributes heat evenly on the bottom of the pan and cooks the crust evenly - which always seems to be the problem with homemade pizzas)
Let cool for about 5 minutes before serving
Doesn't that look delicious! I must say I was a bit impressed with it.

Ideas/Tips:
  • Use the extra dough for garlic knots as a perfect addition to this meal
  • My crust seemed to get a little thick right around the bottom edges - make sure to get it all even.
  • I will for sure add olives or jalapenos or something - just the meat made it seem a bit lasagna-y
This was a bit more difficult/time consuming meal but I already can't wait to make it again - Anyone want to come over for a pizza night?

I want to make sure credit is given where credit is due - so I got this recipe here.

Saturday, March 26, 2011

Anybody Out There?

(tap,tap)
Is anyone reading this?

I've decided to ask for people's help, feedback, opinions, etc. From telling me about what you have tried and what you liked/didn't like - to sharing your recipes with me so I can try them - any tips or suggestions - and other such goodness.

I've set up this email that I would really love to hear from any of you:

foodbyjill@gmail.com

I figured an email was easier than comments for sending recipes and I would love to post and share anything that you are all liking. 

I just thought I would give this a try and hopefully I can find some great new recipes to add to this collection and give me so dinner ideas (I hate deciding what to make every night). 

Ok, Thanks. You can all keep reading in anonymity. 

Look forward to some great new recipes I'm trying this weekend.
I'm so excited to try them and post them!
Stay tuned...

Thursday, March 24, 2011

Pizza Joint Must-Have

I've wanted to find a good recipe for Garlic Knots and have read a lot of recipes, but last night I struck gold! I didn't even use a recipe I read - not that it is hard - but I just made them by what sounded good for what I like.

I better make these sparingly, with their bite-size goodness it is hard to limit myself!

Easy Peasy Garlic Knots

Ingredients:
1 can (11 oz) refrigerator pizza dough/crust
Butter (about 3 Tablespoons) - melted
Garlic Salt (this is for ease – you can use fresh chopped garlic)
Parmesan cheese (I prefer shredded)
Parsley (I just use dried and I even crumble it so it isn’t big pieces – but that is just personal preference)
Red pepper flakes

Directions:
-Open dough/crust and roll into a rectangle (when I opened my can it wasn’t a nice rectangle for me and I think the dough held together better after rolling it out)
-Cut 1 inch strips on the short side and then cut down the middle the long way (this does not have to be scientific, as long as they are pretty close the same size – but even if not it’s not a huge deal)
-Tie into knots (tucking the ends underneath so it is like a little ball) and place on baking sheet (they don’t grow too much so you can fit them all on one pan)
-Cook at 450 until golden brown (mine were maybe 10 min)
-Put in a large bowl and gently coat with melted butter (you can just stir them with a large spoon since they are so small and they nicely evenly coated)
-Next add Parmesan cheese, parsley, and red pepper flakes to taste (no real magic here – just do to your liking)

Wha-la! Deliciousness! And from start to finish – 20 min

Ideas/tips:
  • These are delicious dipped in ranch, but you can also use pizza sauce or marinara sauce to dip them in
  • You can probably use any bread dough for this, but I have used breadstick dough before and they were much more flat and light, the pizza dough is a bit more dense and I think more fitting for these.

(Sorry no picture - we ate them too fast to even have time for one -
but trust me, I will be making these again)

Tuesday, March 22, 2011

Little Red Hen

One of my favorite things to make these days is home made bread. I love the smell of it while I'm making it, getting to eat it hot and fresh out of the oven, and then getting to eat it for days after. I've also loved that it is whole wheat bread. Healthy and delicious.

Whole Wheat Bread

Ingredients

3 cups warm water
2 (.25 ounce) packages active dry yeast
1/3 cup honey
5 cups bread flour
3 tablespoons butter, melted
1/3 cup honey
1 tablespoon salt
3 1/2 cups whole wheat flour
2 tablespoons butter, melted 

Directions

  1. In a large bowl, mix warm water, yeast, and 1/3 cup honey. Add 5 cups white bread flour, and stir to combine. Let set for 30 minutes, or until big and bubbly.
  2. Mix in 3 tablespoons melted butter, 1/3 cup honey, and salt. Stir in 2 cups whole wheat flour. Flour a flat surface and knead with whole wheat flour until not real sticky - just pulling away from the counter, but still sticky to touch. This may take an additional 2 to 4 cups of whole wheat flour. Place in a greased bowl, turning once to coat the surface of the dough. Cover with a dishtowel. Let rise in a warm place until doubled.
  3. Punch down, and divide into 3 loaves (I've found that it more evenly makes 4). Place in greased 9 x 5 inch loaf pans, and allow to rise until dough has topped the pans by one inch.
  4. Bake at 350 degrees F (175 degrees C) for 25 to 30 minutes; do not overbake. Lightly brush the tops of loaves with 2 tablespoons melted butter or margarine when done to prevent crust from getting hard. Cool completely
 Ideas:
  • The last time I made this I greased the pans and then lined with cornmeal - I LOVED it!
  • My favorite thing to do with the bread (especially a few days after it is made and isn't quite as fresh) is French Toast - yes, I like mine with sugar not syrup
  •  Just enjoy the smell and taste of homemade bread!

Practically Perfect

I've always love the weekends that it allows for special breakfasts. This weekend was no exception. Sunday I tried out a new recipe:

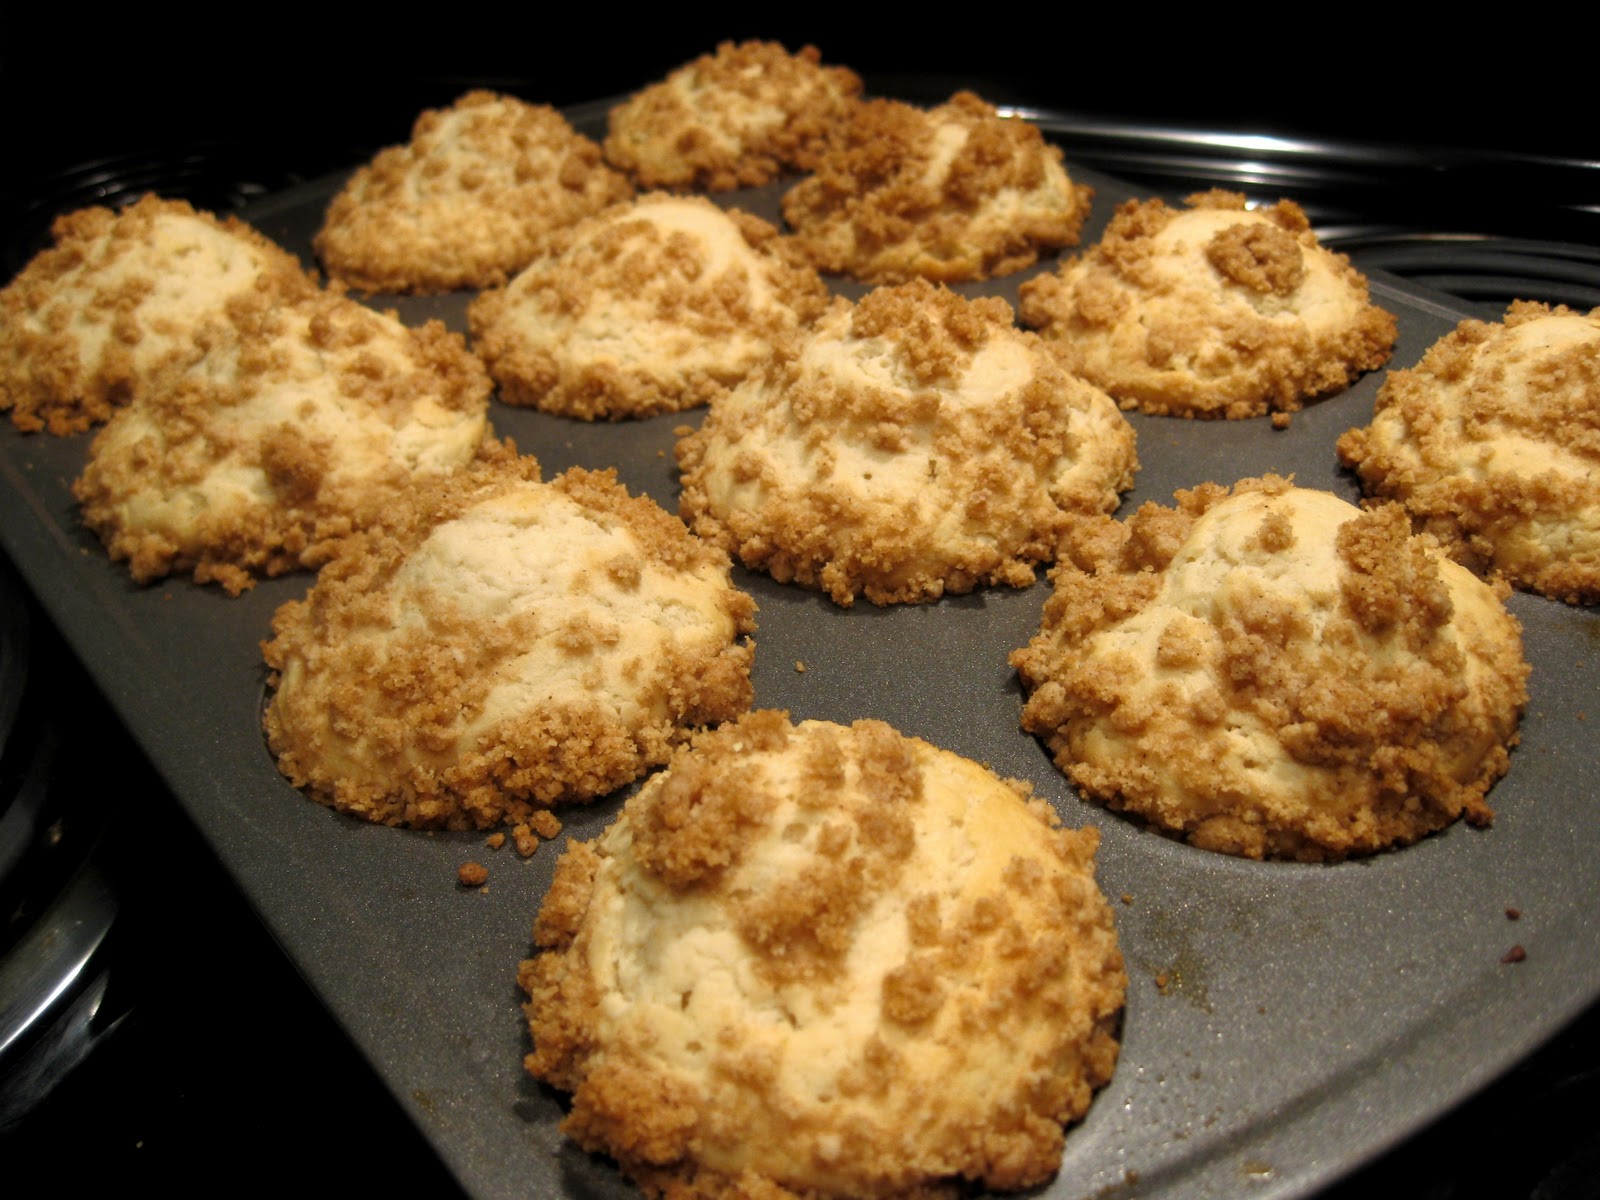
Poppins
1/2 C butter
2 C sifted flour
3 tsp baking powder
1 C milk
1/2 tsp salt
1 beaten egg
1/2 C sugar

Mix all ingredients together, put into muffin tins (I didn't grease mine or use muffin cups but I might use one or the other next time)

1/4 C melted butter
1/2 C sifted flour
1/2 C brown sugar
1/4 ts cinnamon

Mix and crumble on top of batter.

Bake for 30 min at 375 - makes 12

Ideas:
  • make some simple frosting and drizzle on the top
  • butter is a must - although they are good without it right out of the oven
  • They stay really light even though they are done so I might cook around 25 min next time to keep them a little more moist

Friday, March 18, 2011

Penne Rosa Knock Off

This is VERY similar to Noodle's & Company's Penne Rosa - my favorite dish there!
Courtesy of Cam's iphone - could I ask for a better photographer?

Penne Rosa
Cook/Prep time: approx 40 min
Skill level: easy peasy

Ingredients:
1 tablespoon olive or vegetable oil
1 pound boneless, skinless chicken breast halves, cut into 1-inch pieces
1 heaping tablespoon crushed garlic 
2 teaspoons dried basil leaves
2 teaspoons dried oregano leaves
2 cans (14 1/2 ounces each) diced tomatoes
2 cups whipping (heavy) cream
1/2 teaspoon salt
1/2 teaspoon freshly ground pepper
1/4 teaspoon ground red pepper (cayenne)
2 1/2 cups rigatoni pasta (8 ounces)
1/2 green pepper
1/2 red pepper
1 zucchini
1 head broccoli

Feta or Shredded Parmesan cheese, if desired

Directions:
- Heat oil in skillet over medium-high heat. Cook chicken, garlic, basil and oregano in oil about 5 minutes, stirring frequently, until chicken is no longer pink in center.
- Start cooking pasta as directed on package
- Stir in tomatoes, whipping cream, salt, pepper and red pepper. Heat to boiling; reduce heat to low. Simmer uncovered about 10 minutes or until slightly thickened.
- With about 2 minutes left on the pasta, add broccoli. Drain pasta. Stir rigatoni and vegetables into chicken mixture; cook until hot.
- Serve and top with cheese.

Serves 8

Tips/Ideas:
  • Continue the idea of N&C's dish and top with Parmesan crusted chicken instead of cooking it in.
  • This can be very easily made vegetarian.
  • The spice can be adjusted per your taste - I would do it spicier as Cam would do it less
  • Add spinach near the end to wilt in
  • I would also love garlic bread with this next time - when does bread not make a meal better?
I always love trying a new recipe and liking it, but also coming up with ways to make it better next time.