Showing posts with label bread. Show all posts

Tuesday, June 14, 2011

Grilled Pizza's

I've always wanted to try grilling pizza - it just sounds delicious. Little did I know just how easy it was!
I found a recipe for dough for the grill:

Grill Dough
Ingredients:
  • 2 cups all-purpose flour
  • 1/2 teaspoon salt
  • 1 1/2 teaspoon white sugar
  • 1 (.25 ounce) package active dry yeast
  • 1 tablespoon olive oil
  • 2 tablespoons cornmeal for dusting
  • 3/4 cup warm water (110 degrees F/45 degrees C)
Directions:
  • Proof yeast in warm water and 1/2 teaspoon sugar (just stir together and leave until bubbly - about 5-10 min)
  • Mix all other ingredients together, create a well in the middle and add the water and yeast - mix until elastic (knead by hand or in a mixer)
  • Let rise for 1 1/2 hours (should be about double)
  • Punch down and divide - makes about 4 - 8 in pizza's
  • Roll out on floured surface until pretty thin (I rolled them all out and stacked them between wax paper to take them all out to the grill)
Then we tried out several different kinds of pizza's.

Grilling
  • spray grill with cooking spray
  • brush olive oil on one side of dough and place on the heated grill (I put one side on high and one on low - used low side to until the dough started to bubble just slightly and then the hot side to get it crispy)
  • once one side is done, remove from grill, brush uncooked side with olive oil, turn over and put the toppings on the cooked side (have I lost you yet?) - think minimal toppings - with the crust so thin it goes pretty far and it cooks better with little sauce and cheese so it doesn't get soggy 
  • Return to grill uncooked side down (return only to the low side as it needs time for the toppings to warm and melt) - watch the pizza carefully as it goes from done to too-done very fast.
My favorite type of pizza:

PESTO PIZZA

Topped with: Pesto, feta cheese, black olives, and chopped tomatoes (green peppers were on there but I wasn't loving them)

Clearly the types of pizza you can make are endless and this thinner crust is perfect for stronger flavors like this pesto and feta - I had thought of a white pizza with either ranch or Alfredo, BBQ Chicken, or even a spinach artichoke dip as a base - oh my mouth is watering just thinking about all these options!

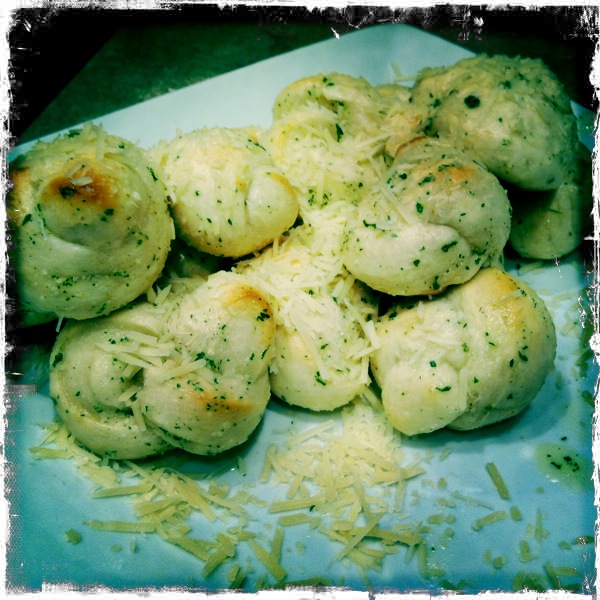
The other thing we coupled our meal with was Pizza Factor Breadsticks - at least our attempt at them.

Pizza Factory Breadsticks


These are even easier  (although not quite on the money yet)

Dough:
Rhoads Rolls (2 per breadstick)

Glaze:
2-3 Tbsp melted butter
1/4 tsp garlic salt
1/4 tsp garlic powder
1/4 tsp dill weed (I replaced with half parsley and half oregano -or even some basil would work)

Directions:
Let the dough rise until double
knead 2 rolls together and rub between hands to create a snake
start at one end of a large bamboo skewer and wrap around
place on cake pan (this way there won't be a flat bottom)
let rise again until about double again
Cook at 350 for about 15 min
brush with glaze and top with Parmesan cheese

Mine kind of stuck to the skewer so I thought of soaking them in olive oil (which I'll try next time)
I have since found a recipe to make these from scratch that I may try sometime, but these are so easy with no dough prep.

I hope you enjoy all these things as much as we did. I'm already dying for that pesto pizza again.

Party Idea: I think this pizza could be so fun for a dinner party. You can set up a buffet table with different sauces, cheeses, veggies, and other toppings. It would be so delish, each person can make them to their own taste, and if you are creative (which I'm not) I'm sure the buffet table alone could be the highlight of the party.

Monday, April 18, 2011

Homemade Bagels

There are some things that I would never have even thought to have made at home - bagels are one of them. About a month ago my mother-in-law posted on facebook that she got up and made bagels. I was blown away that they were even something that could be made at home - silly me.

So I made a goal to try them myself - and you know what? They are actually quite easy, I think easier than making bread. They even turned out so well Cam asked for some more when I got back from Vegas on Sunday.

I pretty much just copied this recipe (from here) since there are so many directions. But I have added my own little tips from my experience.

Delicious Bagels

 
3 1/2 C bread flour (you can substitute all-purpose flour but mine did not turn out as well when I did that)
2 pkg dry yeast
3 Tbs sugar
1 Tbs salt
1 1/2 C hot water
3 quarts water
1 1/2 Tbs barley malt syrup (or sugar or honey in the same amount)
1 egg white - beaten with 1 tsp water
Toppings of choice
cornmeal for dusting on the baking sheet
Make the dough: In a mixing bowl (or the bowl of an electric mixer) measure 3 cups of the flour and stir in all the remaining dry ingredients. Pour in the hot water, and stir vigorously with a wooden spoon (or with the flat paddle attachment of the electric mixer at low speed) and beat for about 2 minutes.

Add the remaining half-cup of flour, a little at a time, stirring by hand. When the batter becomes thick and heavy, attach the mixer’s dough hook (if using) or lift the dough from the bowl and place it on a lightly floured work surface for kneading by hand.

Knead the dough: Knead the dough at medium low speed on the mixer – or by hand (using a push, turn and fold motion, energetically) for about 10 minutes – or until the dough is firm and solid when pinched with the fingers. Add flour as needed if the dough is sticky in your hands, or sticks to the sides of the mixing bowl (if using electric mixer).

First Rising: When dough is kneaded enough, place it in an oiled mixing bowl, cover the bowl tightly with plastic wrap, and set aside at room temperature until it has doubled in volume – about 1 hour.

Prepare water bath: Near the end of this rising time, bring the 3 quarts of water to the boil in a large saucepan. Add the malt syrup or sugar; then, reduce the heat and leave the water just barely moving – at a slow simmer.

Shape the bagels: When the dough has doubled in volume, turn it out onto a lightly floured work surface and punch it down with extended fingers to remove excess gas.

Divide the dough into 10 pieces (each will weigh about 3-4 ounces). Shape each piece into a ball. Allow the balls to stand and relax for a few minutes – then flatten each one with the palm of your hand.

With your thumb, press deep into the center of the bagel and tear the depression open with your fingers. Pull the hole open, pull it down over a finger and smooth the rough edges. It should look like a bagel! Form all of the bagels and place them on your work surface.

Second Rising: Cover the shaped bagels with wax paper or parchment paper. Leave them at room temperature just until the dough has risen slightly – about 10 minutes.

Prepare the baking sheet: Preheat the oven to 400 degrees. Grease a baking sheet with shortening (or use a non-stick baking sheet, or line a baking sheet with “Silpat” or similar material) and sprinkle the baking sheet with cornmeal.

Water-bathing the bagels: Into the gently simmering water prepared earlier, slip one bagel at a time. Simmer only 2 or 3 bagels at a time – do not crowd the pan. The bagels will sink and then rise again after a few seconds. Simmer gently for one minute, turning each bagel over once during that time. Lift each bagel out of the water with the skimmer (or gently with tongs or a slotted spatula), drain briefly on a towel, then place each bagel on the prepared baking sheet. Repeat until all bagels are simmered, drained and on the baking sheet - you can place these very close together and fit all 10 on one pan. They don't grow too much after this point.

Baking the bagels: Brush each bagel lightly with the egg-white-water mixture first, then sprinkle the topping if desired – or leave unadorned, for water bagels. If toppings are desired (my favorite is asiago cheese - but sesame seeds, poppy seeds or anything else you might like), now is the time to add them, by sprinkling the desired topping over the bagels. 

Place the baking sheet on the middle rack of the preheated oven for 25-30 minutes. When the bagel tops are a light brown, turn them over to complete baking. This turning-over step will keep the bagels in a rounded shape, instead of their being flat on the bottom (I did flip mine over, I did still get a flat bottom but they do give the top a bit of a more browned/crunchy top - which I really liked). When brown and shiny, remove the finished bagels from the oven.

Place the bagels on a metal rack to cool.

Tips/Ideas:
  • I did use my kitchen aid for this and it makes it SO easy, so if you attempt to do this by hand it may be a bit more work...
  • I don't think you can be too liberal with the toppings - so add a lot. The bagels are so dense it needs a lot of topping (especially the cheese one's - the more the better!)
  • The bread flour honestly makes a world of difference - I won't make these again without it.
  • I think I will experiment with more toppings - possibly sunflower seeds, onion (if you like that), garlic something or other, and hopefully cinnamon sugar.
  • I might try to make whole wheat bagels or one's that have toppings/fillings mixed in.
  • They are delish right out of the oven - but they do set up a bit more once they are out of the oven so prime eating time (in my opinion) is about 10 min out of the oven. Yum... my mouth is watering wanting make these again right now!
Hopefully if you try these you enjoy them and are as impressed with yourself as I was. I just might have to start thinking of all the other foods I never thought were possible to make...

Wednesday, April 6, 2011

Prize Winner

Finally documented: My Garlic Knots (here)
Seriously, you've got to try these things.

Thursday, March 24, 2011

Pizza Joint Must-Have

I've wanted to find a good recipe for Garlic Knots and have read a lot of recipes, but last night I struck gold! I didn't even use a recipe I read - not that it is hard - but I just made them by what sounded good for what I like.

I better make these sparingly, with their bite-size goodness it is hard to limit myself!

Easy Peasy Garlic Knots

Ingredients:
1 can (11 oz) refrigerator pizza dough/crust
Butter (about 3 Tablespoons) - melted
Garlic Salt (this is for ease – you can use fresh chopped garlic)
Parmesan cheese (I prefer shredded)
Parsley (I just use dried and I even crumble it so it isn’t big pieces – but that is just personal preference)
Red pepper flakes

Directions:
-Open dough/crust and roll into a rectangle (when I opened my can it wasn’t a nice rectangle for me and I think the dough held together better after rolling it out)
-Cut 1 inch strips on the short side and then cut down the middle the long way (this does not have to be scientific, as long as they are pretty close the same size – but even if not it’s not a huge deal)
-Tie into knots (tucking the ends underneath so it is like a little ball) and place on baking sheet (they don’t grow too much so you can fit them all on one pan)
-Cook at 450 until golden brown (mine were maybe 10 min)
-Put in a large bowl and gently coat with melted butter (you can just stir them with a large spoon since they are so small and they nicely evenly coated)
-Next add Parmesan cheese, parsley, and red pepper flakes to taste (no real magic here – just do to your liking)

Wha-la! Deliciousness! And from start to finish – 20 min

Ideas/tips:
  • These are delicious dipped in ranch, but you can also use pizza sauce or marinara sauce to dip them in
  • You can probably use any bread dough for this, but I have used breadstick dough before and they were much more flat and light, the pizza dough is a bit more dense and I think more fitting for these.

(Sorry no picture - we ate them too fast to even have time for one -
but trust me, I will be making these again)

Tuesday, March 22, 2011

Little Red Hen

One of my favorite things to make these days is home made bread. I love the smell of it while I'm making it, getting to eat it hot and fresh out of the oven, and then getting to eat it for days after. I've also loved that it is whole wheat bread. Healthy and delicious.

Whole Wheat Bread

Ingredients

3 cups warm water
2 (.25 ounce) packages active dry yeast
1/3 cup honey
5 cups bread flour
3 tablespoons butter, melted
1/3 cup honey
1 tablespoon salt
3 1/2 cups whole wheat flour
2 tablespoons butter, melted 

Directions

  1. In a large bowl, mix warm water, yeast, and 1/3 cup honey. Add 5 cups white bread flour, and stir to combine. Let set for 30 minutes, or until big and bubbly.
  2. Mix in 3 tablespoons melted butter, 1/3 cup honey, and salt. Stir in 2 cups whole wheat flour. Flour a flat surface and knead with whole wheat flour until not real sticky - just pulling away from the counter, but still sticky to touch. This may take an additional 2 to 4 cups of whole wheat flour. Place in a greased bowl, turning once to coat the surface of the dough. Cover with a dishtowel. Let rise in a warm place until doubled.
  3. Punch down, and divide into 3 loaves (I've found that it more evenly makes 4). Place in greased 9 x 5 inch loaf pans, and allow to rise until dough has topped the pans by one inch.
  4. Bake at 350 degrees F (175 degrees C) for 25 to 30 minutes; do not overbake. Lightly brush the tops of loaves with 2 tablespoons melted butter or margarine when done to prevent crust from getting hard. Cool completely
 Ideas:
  • The last time I made this I greased the pans and then lined with cornmeal - I LOVED it!
  • My favorite thing to do with the bread (especially a few days after it is made and isn't quite as fresh) is French Toast - yes, I like mine with sugar not syrup
  •  Just enjoy the smell and taste of homemade bread!